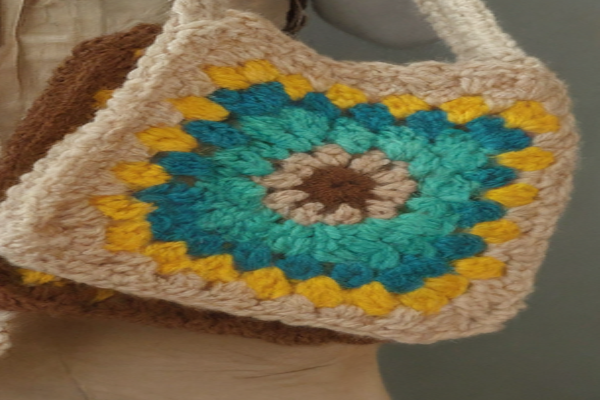
This Crochet Granny Square Bag pattern is available for free! This simple and quick project uses a ‘starburst’ granny square to create a handmade, boho-style purse. Find the free pattern below

Pattern Design & Construction
This Crochet Granny Square Purse comes together quickly, making it an ideal handmade gift! It’s also a perfect project for using up scrap yarn, as granny squares shine with multiple colors.
The finished boho-style purse measures 7×7 inches and is made up of two starburst granny squares, crocheted together with a border. An adjustable crossbody strap will also be added to suit your preferred length. This pattern is classified as intermediate due to the more advanced stitches required for the granny square.
- Yarn: I’m using medium (4) worsted weight yarn for this Crochet Boho Purse design. I love working with worsted weight yarn because of its versatility and durability. You can easily substitute it with another worsted weight yarn, as long as the ounces per gram are similar.
- For this tutorial, the yarn colors used are:
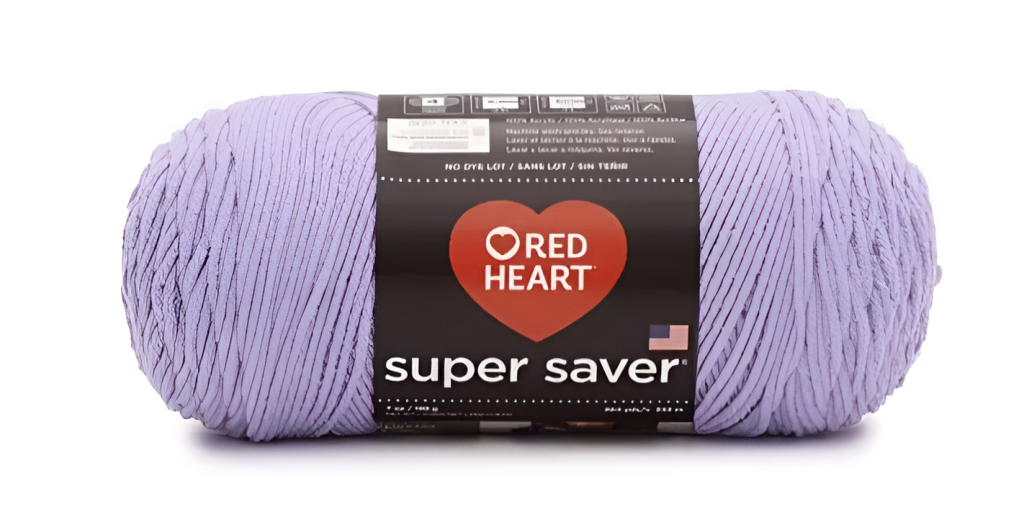
- • Red Heart Super Saver, Medium 4, 7 oz / 198 g, in the color Light Jasmine
- • Red Heart Super Saver, Medium 4, 7 oz / 198 g, in the color Saffron
- • Red Heart Super Saver, Medium 4, 7 oz / 198 g, in the color Jade
- • Yarn Bee Yarn ID, Medium 4, 5 oz / 252 yd, in the color Oats
- • Yarn Bee Yarn Soft & Sleek, Medium 4, 5 oz / 232 yd, in the color Tobacco
-
Additional Crochet Supplies:
If you purchase any supplies, you’re supporting this creator at no additional cost. Thank you! - • Size H (5mm) Crochet Hook
- • Tapestry Needle / Yarn Needle
- • Scissors
- • Stitch Markers

-
Stitches:
This pattern is written in US crochet terminology. - • Chain
- • Magic Circle
- • Slip Stitch
- • SC – Single Crochet
- • HDC – Half Double Crochet
- • DC – Double Crochet
- • TC – Triple Crochet (also known as Treble Crochet)
- • Puff Stitch (details below)
- • Bobble Stitch (details below)
- For stitches I don’t use very often, like the Puff Stitch and Bobble Stitch, I sometimes struggle to remember the exact steps. To make it easier, I’ve listed the specific instructions for these stitches below, as they will be used in this pattern.
-
Puff Stitch:
A puff stitch consists of three unfinished HDC in the same stitch. - 1. Start with a loop on the hook (Loop Count: 1)
- 2. Yarn over, insert hook, yarn over, pull up a loop (Loop Count: 3)
- 3. Yarn over, insert hook, yarn over, pull up a loop (Loop Count: 5)
- 4. Yarn over, insert hook, yarn over, pull up a loop (Loop Count: 7)
- 5. Yarn over, pull through all 7 loops, chain 1
-
Bobble Stitch:
A bobble stitch consists of four unfinished DC in the same stitch. - 1. Start with a loop on the hook (Loop Count: 1)
- 2. Yarn over, insert hook, pull up a loop, yarn over, pull through two (Loop Count: 2)
- 3. Yarn over, insert hook, pull up a loop, yarn over, pull through two (Loop Count: 3)
- 4. Yarn over, insert hook, pull up a loop, yarn over, pull through two (Loop Count: 4)
- 5. Yarn over, insert hook, pull up a loop, yarn over, pull through two (Loop Count: 5)
- 6. Yarn over, pull through all 5 loops, chain 2

Starburst Granny Square (Make 2):
- Round 1:
Using your center color (Color #1), start with a magic circle.
Chain 3, then work 15 double crochets into the circle. Pull tight to close the circle.
(You should have 15 stitches, or 16 if you include the initial chain 3.)
Finish the round with a slip stitch into the 3rd chain of the starting chain 3.
Switch to Color #2 for the next round.

Round 2:
Chain 3, then make a puff stitch in each stitch all the way around (16 stitches total).
For the first puff stitch, work into the same stitch as the chain 3.
Complete the round by slip stitching into the 3rd chain of the starting chain 3.
Switch to Color #3 for the next round.

Round 3:
Chain 3, then work a bobble stitch into each space between the puff stitches from Round 2 (16 stitches total).
For the first bobble stitch, work into the same space as the chain 3.
Finish the round by slip stitching into the 3rd chain of the starting chain 3.
Switch to Color #4 for the next round.

Round 4:
Continue working into the spaces from the previous round, as indicated in brackets, to begin shaping the square:
- [Chain 3, 2 DC]
- [2 TC, chain 2, 2 TC], [3 DC], [3 HDC], [3 DC]
- [2 TC, chain 2, 2 TC], [3 DC], [3 HDC], [3 DC]
- [2 TC, chain 2, 2 TC], [3 DC], [3 HDC], [3 DC]
- [2 TC, chain 2, 2 TC], [3 DC], [3 HDC]
Finish the round with a slip stitch into the 3rd chain of the starting chain 3. Switch to Color #1 for the next round.

Round 5:
Continue working into the spaces from the previous round, following the instructions in brackets to further expand the square shape:
- [Chain 3, 2 HDC], [3 DC]
- [2 TC, chain 2, 2 TC], [3 DC], [3 HDC], [3 HDC], [3 DC]
- [2 TC, chain 2, 2 TC], [3 DC], [3 HDC], [3 HDC], [3 DC]
- [2 TC, chain 2, 2 TC], [3 DC], [3 HDC], [3 HDC], [3 DC]
- [2 TC, chain 2, 2 TC], [3 DC], [3 HDC]
Finish the round with a slip stitch into the 3rd chain of the starting chain 3. Switch to Color #2 for the next round.

Round 6:
Continue working into the spaces from the previous round, as indicated in brackets, to further expand the square shape:
- [Chain 3, 2 HDC], [3 HDC], [3 DC]
- [2 TC, chain 2, 2 TC], [3 DC], [3 HDC], [3 HDC], [3 HDC], [3 DC]
- [2 TC, chain 2, 2 TC], [3 DC], [3 HDC], [3 HDC], [3 HDC], [3 DC]
- [2 TC, chain 2, 2 TC], [3 DC], [3 HDC], [3 HDC], [3 HDC], [3 DC]
- [2 TC, chain 2, 2 TC], [3 DC], [3 HDC]
Finish the round with a slip stitch into the 3rd chain of the starting chain 3. Chain 1, then tie off.
Weave in all ends and trim any excess yarn.

Assembly:
Align both granny squares with the right sides facing outward. Using Color #2, join yarn to the top left corner and begin single crocheting the two squares together along the left edge, placing one SC in each stitch.
To maintain the corner shape, work the following into each corner space: [SC, chain 1, SC].
Continue single crocheting down the left side until you reach the top right corner. At this point, three sides of the purse base will be joined together.

Top:
To finish the top edge of the purse opening, continue single crocheting around, but do not join the two sides together. Chain 1, then single crochet along the top front side only. When you reach the end of the front side, continue single crocheting across the back side.

When you return to the starting point, slip stitch to join, chain 1, and tie off, leaving a long enough tail to weave in the end.
-
Strap:
With Color #2: - 1. Chain stitch to the desired length of your strap, plus an additional chain 1. (For my strap, I chained 150 + 1 = 151).
- 2. Complete three rows of single crochet, then tie off, leaving a long tail.
- 3. Using the long tail, sew the first end of the strap onto the purse with a tapestry needle.
- 4. Ensure the strap is not twisted, then attach the other end of the strap (you will need a new strand to attach this side).

Adding a cloth liner inside the purse could really enhance the design.


Thank you for reading! If you’re a beginner and don’t know how to crochet flat circles using double crochet stitches, you can check out this post: How to Crochet Flat Circles Using Double Crochet Stitches.
